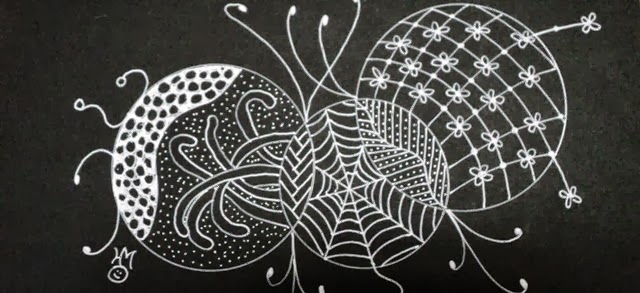
I used watercolour pencil crayons to add a little colour to mine.
Zentangle on black

Monday 28 October 2013
Friday 25 October 2013
Challenge #11 Halloween Pumpkins
This Thursday is Halloween so we decided on a Halloween pumpkin zentangle for this week. My goal is to have the results of the challenge posted for Halloween day.
The Gourds
Jay's gourd turned out fantastic! She was able to photograph it from all sides. Note the Halloween themed tangles.
Mine, on the other hand was a total flop. When I finally got it out to zentangle it, it had sort of gone bad on one side. I couldn't just pop out to the store to get another one so I tangled the side that wasn't soft. I tried to take a decent picture of it but it looks pretty bad.
So here is my pathetic attempt to zentangle my (half rotten) gourd. Enjoy Jay's!
Tuesday 22 October 2013
Challenge #10 Gourds
For this week we have decided to zentangle gourds. A friend emailed me a photo of some decorated pumpkins and included in the photo was a zentangled gourd. My sister loved the idea. The challenge for me was to find a gourd. There are certainly no gourds in the tiny NWT community that I live in. My sister had no trouble finding the perfect gourd for challenge but she lives in Edmonton. Here is her gourd:
Fortunately, I was heading out of the community for meetings and I was able to find a gourd in Yellowknife. Here it is:
When I told the store owner what I planned to do with it, she insisted on carefully wrapping it in bubble wrap for a safe journey home.
So this week's challenge is to zentangle our gourds.
Sunday 13 October 2013
Challenge #9 3D Zentangle
The next challenge is to create a 3D zentangle object. Any object will do. Here is a pattern for a simple origami box.
We decided to make sure to take a picture of the zentangle on the paper before you make it into the object. That way we can really appreciate the hard work. Then take another picture of the finished object.
Tuesday, October 22
I am a little late with our results of this challenge. We used an app to display our results. This app, Nostalgio, allows you to make a collage of your chosen photos. Here are our results for the week:
This is box. Once I had the top and bottom zentangled I folded it and then I lost all my hard work. Next time I would plan it around the folds. I would make the box, unfold it, tangle it and then retold it.
That is just what Jay did with hers. She chose not to zentangle the top. Hers comes together nicely and she doesn't lose her artwork.
Sunday 6 October 2013
Challenge #8 A GIANT Zentangle
The challenge this week is to make a giant zentangle using a regular sharpie. Use any large size paper you can find. We will put a loonie in the corner of the zentangle when we take the picture. We are allowed to shade if we like but it has got to be a very big zentangle. Seeing as I live in the middle of nowhere finding a large piece of paper maybe the biggest challenge. Jay is using a large piece of paper from the ikea store. Check in later for the results of this week's challenge. Think big...
We have all week to work on our Giant Zentangle. We decided not to limit ourselves to just a regular sharpie. We used whatever we wanted. But for the most part, we used a regular sharpie just because of the amount of space we had to fill. We used a sharpie marker to show the relative size instead of a loonie because to loonie was too hard to see.
This was a really fun exercise. It was nice to "go big"!
Here are the results:
Mine
Challenge #7 Zentangle Noir
This summer I had the opportunity to attend a class at the Augusta Quilt Show on zentangling on black. We learned that you can use a white (or light) gel pen and you can shade with a white (or light) charcoal pencil. And I bet you thought charcoal was only black, so did I. The difficulty is finding a permanent pen that actually shows up on black paper. Because I took the course, I have a white gel pen and a white charcoal pencil. My twin, on the other hand, has used a silver marker on black paper for this challenge.
Black drawing paper is readily available and you can just experiment with pens to see what works.
Here is mine zentangle noir, (white gel pen with white charcoal):
Here is Jay's (silver sharpie on black)
Next post, we'll be up to date!
I will post the challenges on Sundays. And by the following Sunday I will post our results.
Thursday 3 October 2013
Challenge #6 A New String to Try
This week Jay picked out a string for us to zentangle. The strings in a zentangle are the lines you draw that divide the zentangle into sections. Strings can be randomly drawn or planned. Jay chose #11 from this array of string choices.
She got these strings from Pinterest.
The funny thing is that when we had both completed our challenge, we had both included a "ribbon" floating through the zentangle and we both had added colour to the ribbon. It's weird how that kind of thing happens. We live miles apart but our zentangle had similar elements.
Here's mine:
Subscribe to:
Posts (Atom)


